New Blogging Partner : 7 Search


The Accessory Ads program from 7Search provides affiliates with a way to integrate an AdZone of advertisements into their pages and earn 60% of the revenue.
What makes AccessoryAds unique is that affiliates can guarantee that competitors will never appear on their site - unlike contextual solutions from Google's Adsense or the Yahoo! Publisher program.
AccessoryAds is a more appropriate solution for websites selling products or services because the advertising that is displayed within your AdZone is not based on semantic (language) assumptions, but rather the category of business that the affiliate chooses. Pick a category for your website and the 7Search system associates targeted advertisements to display. It's that simple!
For example, if an advertiser sells flowers and bids on the category "Shopping: Gifts", surfers visiting your "gift" related website may also be interested in buying flowers and click the AccessoryAd.
The ability to eliminate competitors from your ads is crucial and is the reason they are called "Accessory Ads". These ads act as accessories to your content. They compliment your website and unlike contextual advertisements never display competitors that are related to your content. AccessoryAds are a vast improvement over the contextual ad concept.

Read more...

How to redirect a blogger URL to another blogger or domain URL

This is the way to do it for the New Blogger. First thing to do always before you make any changes to the template is to backup the template PLUS the Page Elements. Some or all of your old Page Elements will be deleted or become empty when you upload a new or backup template.

1.Log in to your dashboard--> layout- -> Edit HTML

2.Scroll down to where you see tag.

3.Add below code into your template just after the tag.


<meta http-equiv="refresh" content="0;url=http://yourabcurl.com"/>
It should Look Like This

<head>
<meta http-equiv="refresh" content="0;url=http://yourabcurl.com"/>
</head>


4.Replace http://yourabcurl.com with the URL you want to redirect your old blog.

5.Click on Save Templates and you are done.

Read more...

How to make Web link in a LinkBar

Linkbar with simple text links:


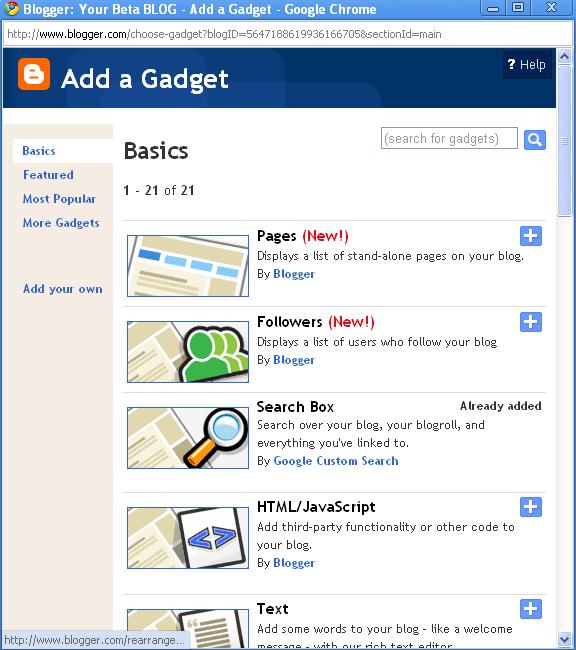
1) From your Blogger dashboard, click "Layout". You should now be at the "Page Elements" page. What we want to do is create a link under your navbar that says "add a Gadget". The first thing you will need to do is to manually change the HTML in your blog to increase the places where you can add page elements. If you have page elements at the top, skip to step 6.

2) Click on your Layout tab and then click 'Edit HTML', Once there hit 'Ctrl + F' to search your HTML template and type in showaddelement to locate the proper place in your HTML code to make changes. Now look for a place in the code that says: 


Change the max widgets to 3 and the showaddelement to yes - You will now have two extra places where you can add page elements.


3) Scroll down a little further and find the place in the code reading:

Change the showaddelement to yes. You should now see options in your template to add page elements before and after your Blog Title.

4) One final place to change the code: Scroll down to where you see the code reading:


Change showaddelement to yes


5) You should now have an 'Add a Gadget' option between the Blog Title (header) and the blog post section. This is the place where you would select 'Add a Gadget' to add a horizontal navigation or menu bar. Once these changes have been made, click 'preview' to make sure that the changes are appearing correctly. Once you have verified that the changes appear correct, click 'save template'. You are now ready to add your links.

6) Write a new post for each page you want to link on your menu bar. The most common are Home, About, Favorites, Contact, but you could do anything. The links you use will be the URL for each specific post.
  • For Home, it will be your blog URL.
  • For Contact, it will be mailto:youraddress@email.com
  • For an individual post, right click the post title, and "copy link location"
  • For a label category, right click the label name, and "copy link location"
7) On your Template/Layout, once at your Page Elements, click the rectangle under your 'Header', which says 'Add a Gadget'. Now in your gadgets select 'HTML/JAVASCRIPT'. Now add this code- click on the text to download.


you can add as many lines as you like, you can add spaces between them to space the text out a bit.


8) Then move (click and drag) the new page element just under your header. 'Preview' to see if you want to change anything, if everything looks good then click 'save'. Now you should have a linkbar- if you are having problems go back and review the steps.

Read more...

What Next? Challenge for any Business

  1. Tell people about it.
  2. Write articles which link back to your blog posts. Not just articles in article directories, but also Squidoo lenses, Hubs, Gather pages, Ning pages, Multiply pages, Google pages ....
  3. Get active on social bookmarking sites, and add a link to the blog on all of your social networking profiles.
  4. Visit the blogs of other people who write on similar topics and leave thoughtful comments there. With links.
  5. If you're on Facebook or LinkedIn, you can pull in an RSS feed from your blog to your profile.
  6. Add a link to the blog on your email signature.
  7. Put your blog URL on your usiness cards. If you don't have business cards, get business cards.
  8. Locate forums where people are discussing the topic of your blog, put your blog URL in your signature, and make intelligent, helpful comments in the forum.
  9. Write a press release about something newsworthy and tie it in with your blog topic. (Note - don't write a press release ABOUT your blog - that won't work.)
  10. Give away your writing. Do guest blogging on the sites of others.
  11. Do "link love" posts every so often. These are posts that many bloggers are doing these days which are simply lists of some of the other posts that they are reading around the web, with links to them. This helps to get the attention of the people that you are linking to, and helps you to develop relationships with them.
  12. Highlight your blog on your Squidoo lens, Hub, Ning page, or Multiply page about the topic, using RSS feeds.
  13. Promote your blog anywhere else in the Web 2.0 world (that doesn't have RSS capability) by linking directly to your best individual posts.
  14. Sign up with Technorati and make use of Technorati tags in your posts.
  15. Write Search Engine Optimised blog posts. Every post is a page. Read up on SEO and follow the guidelines.
  16. Submit your blog to directories. Here is the best list I've found of places to submit your feed or blog, compiled by Luigi Canali De Rossi, who writes under the pseudonym Robin Good.
  17. Best Blog Directory And RSS Submission Sites
  18. Add a link to the blog on your bio whenever you publish it or send it to someone.
  19. Ping your blog. Use blogging software that can be set up to do that automatically. Wordpress is an example, but not the only one.
  20. Subnit your blog to search engines.
  21. Write to other bloggers suggesting a link trade or a guest post trade.
  22. Put up a link list of your favorite blogs and let those bloggers know about it. They might just reciprocate.
  23. Reply to comments. If people see that you read and reply to comments, they will read more and comment more.
  24. Create a video about your topic and upload it to YouTube. Include your blog URL in the video and on your YouTube profile.
  25. Rinse and repeat for other video sites.
  26. Use Craigslist (more details here)

  • The community section, located in the top left corner of the main Craigslist screen, provides many opportunities for publicizing your blog. Post in the community section most appropriate to your topic, and provide interesting information, with a link to the full article on your blog. (You can also find guest bloggers for your blog through the "volunteers" section there.)
  • Classes. Hold an online class about a topic related to your blog, and advertise it in the Craigslist "classes" section.
  • Barter. You can offer link exchanges in the parter section, but you can get a lot more creative than that. Post something along the lines of "I have a blog about xyz and am seeking someone to promote it for me in a creative way. Send me an email with your promotional idea and what you'd like in exchange."
  • Services. If you offer services in any way related to the topic of your blog, or writing services in general, post in this section with a link to your blog as evidence of your expertise.
  • Forums. As with any other forum, good quality posts containing your link can translate to blog traffic.

  1. Write an eBook or white paper. If you know enough to blog about a topic then you know enough to write an eBook or white paper. You can promote it through different channels where you can't promote a blog - including places like Clickbank, where you can sell it for actual money! Include your link on all of that promotional material, and in the eBook or report itself, and blog traffic will roll in.
  2. Offer to write expert columns in offline traditional publications, and include a link to your blog in the offer. Even if they don't take you up on the offer, they may reference a blog post of yours in an article by one of their regular contributors.
  3. Encourage your readers to subscribe to your blog via RSS.
  4. Collect email addresses from your readers - even if you have to bribe then with a free coopy of your eBook or white paper to get them - and offer an email update service, so they can be notified when you have made a new post.
  5. Start blogs on platforms like Wordpress, Blogger, Typepad, and Xanga. Post summary versions of your best blog posts there at least once a month, and in between those summary posts, post a linklove post linking to all your new blog posts on your main blog for the month, plus all the summary posts on the other blogs in your blog network.

And it doesn't end there. Marketing and promotion are a constant activity in any business, and generally you should plan to spend at least a third of your time on marketing and promotion - and make that half your time if you don't have a product or service to deliver.


Don't just social bookmark your blog posts (on the sites which allow such a thing) - social bookmark your articles about your blog posts, your Hubs and lenses and Multiply pages, every profile which contains a link to your blog, and any blog post you find elsewhere which is linking back to your blog.


A note about links back to your blog - the anchor text is crucial. Do some keyword research to find out what searches people are doing on your topic. Choose the best half a dozen search phrases, and make sure that any link you create to your blog uses some of those words as the anchor text. So, for example, I wouldn't put "Click here to read my blog" as a link to my blog - I would put "Click here to find out about the lighter side of debt consolidation refinancing".


Blog traffic really comes down to backlinks. Assuming you have done your job well in creating good quality, readable content, your success as a blogger will come down to how many backlinks you can get, because those backlinks will lift your blog posts up the search engine listings for your chosen keywords. Search engine traffic is the Holy Grail of blog traffic.


You can build blog traffic without having much visiblity on the search engines, but the process is slow and involves building very strong relationships with other bloggers in your niche. If you want to create blog traffic fast, you need to woo the search engines.


The study of how to get traffic to your blog is really a life's work. There is so much to learn, and new resources are becoming available every day. The secret to blog traffic is really no secret at all - it's the age-old challenge for any business. Marketing and promotion. It's easy enough to say, runs off the tongue without much effort, but you will actually have to exert quite a bit of effort if you want to attract a decent amount of blog traffic in a reasonable timeframe.

Read more...

How or Why Remove NavBar to Blog

If you really want to remove the blogger navigation bar, you need to access your HTML template. Before I tell you how to do that, however, I'd like to first talk about why you may or may not want to remove the nav bar from your blogspot blog.

Main Reasons To Remove It.
  • It looks more professional without it: Depending on what your purpose for blogging is, you may choose to remove the blogger navbar because having one makes a blog look more like a free-hosted blog and less like a professional site worth taking seriously.
  • It gives you more space at the top of your page: This may not seem significant, but not having the navbar there does give you a bit more space for graphics. I have found this space to be quite useful when designing my own blogs.
Main Reasons To Keep It.
  • It makes editing a little bit easier: You can login directly from the blog itself, and don't have to worry about logging into blogger. You can also edit capsules from the main page, without having to go into elements.
  • You get a teeny bit of traffic from the "next blog" button: And I do mean teenie. I can't even recall the last time I saw traffic from it.
How To Remove It
If you've decided that you definitely want to remove your blogger navbar, it's actually a very simple process that any non-technically-inclined person can accomplish with ease. Just follow these steps:
  1. Login to your blogger dashboard.
  2. Click "Layout"
  3. Click "Edit HTML"
  4. Find the BLUE code you see in the image to your right. The code will be quite near the top of your HTML section, you shouldn't have to scroll very far at all. The blue code should definitely be there, but the data box you see may not be, depending on where your template came from.
  5. ADD the code you see in red precisely where you it see it in the image to your right. If you want to copy and paste it, do so from the bold text you see below:
#navbar-iframe {display: none !important;}
Preview It First!
  • Use your preview button before you click save! If you like what you see, go ahead and save.
What happens if I want the navbar back in the future?
  • Simply go back into your HTML the same way and delete the part you just added. It's really that simple!

Read more...

How to Design Your Own Blog

Use These Most Popular Web Design Tools
Firebug is a web development tool I discovered by accident. Another web designer was looking at my blog, and emailed me some suggested improvements. I had no idea how that person knew some of my code, so I asked. The reply was Firebug.

Firebug is a Firefox web development tool that allows users to peek inside the CSS, HTML, and Javascript of any website on the web browser. It gives users a way to check out elements on an HTML page. From here you can tweak Javascript, CSS, or HTML on any live site. There are also diagnostic and debugging tools along with several plugin extensions to augment your Firebug plugin.

While there are many of these out there, I have found 321Webmaster’s the most reliable and handy to put in my web design tool belt. Before I began digging into my website’s code, I had no idea what a hex code or RGB stood for. In computer language, everything is code and very specific code is used to get specific colors. We are way past the jumbo 64 colors Crayola box when it comes to web design colors available.

A hexadecimal value, or HEX, is some crazy mathematical equation used to tell a computer what color to use. When designing a web page, HTML code will use a hex value or RGB, or (R)ed, (G)reen, and (B)lue, each color having an assigned number between 0 and 255. However, in web design, code can be in either the hex code format or RGB, so it is handy to have a converter to get each of the values.

Colorzilla is another great Firefox add-on for picking up colors on websites. Before I discovered this handy little tool, I would have to try and eyeball a color on the website or dig into the code to see the Hex code or RGB code to apply it to my website. That was a bit time consuming!

This Firefox extension gives developers color design tools like the Eyedropper, ColorPicker, and other goodies. It installs on your status bar for ease of use. The information gives RGB and Hex code, along with other formats.

If you are looking for backgrounds or patterns to use on your website or Twitter page, Colour Lovers has a ton of ways to create patterns or your own palettes for background images. I used this to create a Twitter background, and am considering using it for my website background.

The site is made up of a community where people from all over the world share patterns or palettes on the website. The site allows developers to browse, create, and search themes, patterns, palettes, or colors. There are also design tools like ColorSchemer or Themeleon to help design page backgrounds.

Have you ever wondered how long it takes your site to load on a web browser? This may not only affect your SERP, but also how willing visitors are willing to wait for your site to appear. In the real world, 20 seconds may not seem like a lot, but in the search engine world, this can be an eternity.

Pingdom loads your full page, including all HTML objects such as images, CSS, etc. Essentially, it checks you website by mimicking how a page would actually load in a web browser. When the test is complete, you will view detailed information and statistics about your website, including load time for various objects.

Read more...

How can make a Flash Chat Rooms for My Blog ?


99Chats.com provides a flash chat widget that enables you to interact with your website visitors. This widget allows you to start your own chat room. You can also easily add your chat room to your website, blog, eBay page, social network profile and virtually anywhere on net.

Create Flash Chat Rooms for Your Website, Blog or Social Network99Chats.com is free and could be fully customized, from colors, background and fonts to border style, size and design, to fit perfectly on any web page design. 99Chats.com is light-weight and takes only 65Kb, it also supports tabbed private messaging with chat members. With your free account from 99chats you can start your own chat room.


Read more...

How can make a chat blog ?

3 easy-to-follow steps to embed a chat room in your blog or website using Chatroll live communities. All Chatroll live communities can be easily used as embedded chat rooms. Here’s how:
Create a Chatroll live community to use for your chat room.
  • Go to Chatroll, enter your community’s name in the “Name YourLive Community…” box and click “Create”. Choose a name that fits with your blog, as this name will appear in the chat box title. Write an attractive and detailed description so that people can easily find your new Chatroll community (this will also help drive traffic to your blog).
  • Copy the embed code from the community’s home page. On your live community’s home page (the page that appears after your community has been created) you’ll find a text box labeled ‘embed’ under the chat window. Click the embed code and copy it.
  • Paste the embed code in your blog or web site. Paste the code where you would like the chat room to appear in your site. If you have a blog, you can either place the chat room in individual posts, or you can create a dedicated page on your blog to host the chat.

(IMPORTANT: If you are using the Wordpress Visual Editor, or other visual editors, make sure to switch to HTML editor mode, otherwise Wordpress will remove the embed code! This is a known issue with Wordpress.)

That’s it! You should now have a fully functional chat room in your blog. Here’s what it should look like:

You can now hang out in your new chat room by opening the page where you embedded the chat. It’s that easy! Go ahead and visitChatroll to customize your profile and learn what else you can do with your chat room, such as posting videos, photos, links, and more.

Read more...

How to Promote Your Blog through Networking

Today I want to turn our attention to Networking as a great way to promote a blog. If I were starting out in blogging today knowing what I now know I’d invest significant time each day into connecting with others online. The old adage of ‘it’s not what you know it’s who you know’ rings true in blogging.

By networking I mean doing all of those things that I regularly write about here at YourBetaBlog. Commenting on others blogs, answering comments that others leave on yours, emailing other bloggers when you write something that you think will interest them, making helpful suggestions to other bloggers, connecting with people via social networking sites like Facebook, LinkedIn, MySpace, emailing people to introduce yourself,linking up to others in your niche…. the list could go on… and on…. when it comes to ways to network but today I’d like to put forward a few more general suggestions.

A number of suggestions that I’d make in networking with bloggers:

Be generous 
A lot of the networking that I see going on between bloggers is fairly much about ‘taking’ rather than ‘giving’. One way to make a real impression on another person is to be generous with them. Help them achieve their goals – highlight their best work – encourage them – go out of your way to work on their terms. While you do need to have good boundaries (otherwise people will abuse your generosity) I think a spirit of generosity is the right attitude to go into networking with.

Don’t Expect too much too quick 
The most fruitful relationships that I’ve been a part of in blogging have emerged over time. Let the relationship grow naturally as you build trust and a mutual understanding of who the other person is and how you can work together.

Look for the B-listers 
Many so called ‘A-lister’ bloggers are approached all day long with requests to connect. While you might get lucky – I’ve found that approaching slightly less know blogs can have more chance of working out (and they can still drive a lot of traffic).

Prove Yourself First 
If you’re brand new to your niche it could take time to make an impression. This isn’t necessarily because people are being cliquey – it’s often because they’re waiting to see if you’re going to stick with it and if you know what you’re talking about. There’s nothing more frustrating that networking with someone who disappears a couple of weeks later. Show you’re in it for the long haul and that your blog is making a contribution to the niche and you’ll find people more willing to connect.

Persist But Don’t Annoy 
Some bloggers will take a few emails or conversations before they’ll warm up to you. There’s a lot of noise around the blogosphere so don’t be offended if people don’t respond – try again in a little while – but don’t stalk them :-)

Look in Neighboring Niches 
It is important with blog networking to interact with other bloggers in your own niche – however don’t close yourself to relationships with bloggers outside of your niche – particularly in those that neighbor yours. When you limit yourself just to other bloggers exactly like yours you will end up dealing mainly with people who could see you as a direct competitor. While some will be open to interacting with you I’ve found networking with people outside my niche can be fruitful. Another way to be strategic is to not look for networking opportunities just with other bloggers on your topic – but with bloggers who share a similar demographic of reader.

Ask Questions 
One key that I’ve found to work in networking is to ask a lot of questions of those around you. Some bloggers go into networking with obvious agendas and goals but fail to listen to the other party. When you become a person who asks others about their goals and objectives, where you know what their strengths and weaknesses are and where you know their dreams you not only create a good impression on them but you’ll be in a great position to know where your situation aligns with another person’s – this is where networking becomes most effective.

Become a Go-To Person and a Connector 
As you network with others don’t just focus upon you and the other person – but attempt to draw others into the relationships you have. I find that people are particularly grateful to me when I can’t help them but point them to someone else who can. This creates a good impression upon both of the parties that you connect which can lead them to come to you again with opportunities (ie you become the ‘go to’ person because they know you’ll either help them personally or point them to someone who can).

Have an Elevator Pitch 
A lot has been written about business people being able to articulate what they do in a concise statement (having your elevator pitch). I think being able to do this is important with blog networking too. I get many emails every day from people wanting tow work together in some way and in many cases it’s a few minutes into an email that I even work out who they are and what they are on about. Develop a few key sentences that describe who you are, what you do and what you offer others. Another good elevator pitch is on what your blog is about. Having thought through these things will help others understand what you can bring to a relationship – but they will also help you understand that too.

Look for Points of Synergy 
Perhaps this says more about my personality type, but I’ve found the most profitable relationships to be ones where there was a ’spark’ or ‘energy’ around our interaction – particularly where there was some sort of synergy around goals and objectives but also some sort of a connection when it comes to personality. My style has always been to look for points of ‘energy’ or ’synergy’ and going with them. Perhaps someone else has a more technical description of this but it’s worked well for me.

Read more...

How can put a comment with hyper link on a Blog Post ?

When you want put a comment on a Blog with some text or link and you have wish to not appear in actual condition. So that reason you can try with this html code :

This page contains examples of html link code. You can copy and paste this code into your own HTML documents - just change the values of the attributes as required.


HTML Link: Same Window


  • <a href="http://www.quackit.com/html/codes">Get your HTML codes here!</a>
This code results in:

  • Get your HTML codes here!

Read more...

How to Create Tables in Blogger Post

Almost everyone has a blog, and does post regularly. But when it comes to creating tables in the blog (especially blogger) then one faces lot of problems. There are the following things which comes in picture while creating a table in a blog,
  • How to create table? 
  • How to eliminate the white space in the post, when the table is created using the HTML code? 
This post will describe some of the different ways to create the tables in the blog, along with eliminating the white space formed while creating the tables in HTML. Here we go,


Different ways to Create Tables in Blogger
There are many ways to create cool and well formatted tables in the blogger.
  1. Creating the table in the simple HTML format, 
  2. Creating the table in the Google Spread Sheet, and 
  3. Create a table in MS-Excel and then take a snap shot and upload as a picture. 
1) Creating Table in Blogger’s Post by using HTML code
  • This is the simple and well known method to create table in the blog post. It’s as easy as posting the post. Just write the code for creating the table, with rows and columns, and you are done. The first thing to be kept in mind is, you should be at least aware of how to create tables in HTML. And hence you can go ahead and create one for your post. But this has a certain draw back, as it leads to a lot of white space between the post and the table and looks too weird. Read below to find how to eliminate these white spaces.

Example HTML Table Code

HTML Code:
<table border="1" cellpadding="5" cellspacing="5" width="100%">
<tr>
<th>Table header</th>
</tr>
<tr>
<td width="20%">Table cell 1</td><td>Table cell 2</td>
</tr>
</table>

This results in:

Table headerTable header
Table cell 1Table cell 2

2) Creating Table in Google Spread Sheet
  • Creating the table in Google’s Document, i.e., Spread Sheet, is quite easy, and moreover after publishing the table, you can just copy the code and place it in your blog’s post where you want the table to appear.
How to create table using Google Document’s Spreadsheet?
  • Creating the table is quite easy in Google Spread Sheet, the following things to be noted while to create the table,
  • Go to the blogger’s “dashboard”. 
  • Click on “My Account” on the extreme right side. 
  • Under “My Products”, click “DOCS”. 
  • Now click NEW > SPREAD SHEET 
  • The SpreadSheet is divided inot Rows (number going down) and Columns (letters going across) 
  • Now fill the information in the spread sheet and make the formatting as desired. 
  • Save the spreadsheet by clicking, FILE > SAVE 
  • Now publish the sheet, click – Publish > Publish Now 
  • Select Sheet 1 Only in the next box under “What Parts” 
  • Then at the bottom of that box, click “More Publishing Options” 
  • In the next box that pops open, choose the HTML format: HTML embeded in a web page 
  • “What Sheets” click “Sheet 1 Only”…again. 
  • Now count the numbers of the table, i.e., The starting cell and the end cell in exactly diagonal fashion. 
  • Then click “generate URL” 
And now you are done to publish the post in your blog. Just copy that code into your post and hence your spread sheet/table is on your post.

3) The simplest way
  • Create a table in MS-Excel and then take a snap shot and upload as a picture into your blog, and hence you are done. Even though that’s not exactly creating a table in the blog, but it’s another way to put your table in the blog’s post.

Read more...

Perfect 3 Column Liquid Layout

All the dimensions are in percentage widths so the layout adjusts to any screen resolution. Vertical dimensions are not set so they stretch to the height of the content.

Percentage dimensions of the holy grail layout


Maximum column content widths
To prevent wide content (like long URLs) from destroying the layout (long content can make the page scroll horizontally) the column content divs are set to overflow:hidden. This chops off any content that is wider than the div. Because of this, it's important to know the maximum widths allowable at common screen resolutions. For example, if you choose 800 x 600 pixels as your minimum compatible resolution what is the widest image that can be safely added to each column before it gets chopped off? Here are the figures:800 x 600Left & right columns: 162 pixelsCenter page: 357 pixels1024 x 768Left & right columns: 210 pixelsCenter page: 459 pixels

The nested div structure
I've colour coded each div so it's easy to see:
The header, colmask and footer divs are 100% wide and stacked vertically one after the other. Colmid is inside colmask and colleft is inside colmid. The three column content divs (col1, col2 & col3) are inside colleft. Notice that the main content column (col1) comes before the other columns.

Click Here For Download This Layout

Read more...

HTML Javascript widgets suddenly require text in title field ?

Problem
I have been using the HTML javascript widget since I started blogging. Suddenly, I cannot edit or a new HTML Javascript widget without entering something in the title field. Previously, I could leave that field blank and put my own stuff in there without a title field making things look clumsy. Now, whenever I try to leave that field blank, it will not let me save. Error message: "required field must not be blank." This means that not only can I not edit widgets I already have, but I cannot add new ones. I want to leave that title field blank!!

Solution
1. Add a Gadget for HTML/JavaScript      
 
2. Put your HTML Code in this Gadget 
 
3.Try to save (Without Title)
 
4. Fill the Title Field with the name of HTML/JavaScript (as Gadget name)
5. you can save it and Title will be not shown on your Page as below Image -


See also other Solution on  Google - Blogger  Help Forum

Read more...

Software can detect depression in bloggers’ texts ?

Researchers have developed a software program that can detect depression in blogs and online texts.

The software, developed at Ben-Gurion University of the Negev (BGU), is capable of identifying language that can indicate the writer’s psychological state, which could serve as a screening tool.

Associate Professor Yair Neuman and his team demonstrated that when used to scan more than 300,000 English language blogs posted to mental health Web sites, the program identified what it perceived to be the 100 “most depressed” and 100 “least depressed” bloggers. A panel of four clinical psychologists verified a a 78 percent correlation between the computer’s findings and the panel’s.

“The software program was designed to find depressive content hidden in language that did not mention the obvious terms like “depression” or suicide. A psychologist knows how to spot various emotional states through intuition. Here, we have a program that does this methodically through the innovative use of ‘web intelligence,” explains Neuman.

The program can spot words that express various emotions - like “black” combined with other terms that describe symptoms of depression, such as sleep deprivation or loneliness. The software will be more of an aid to mental health workers and other professionals since “no one can actually replace excellent human judgment,” says Neuman.

With this software, it is possible to analyse proactively. If the blogger agrees, he will know whether or not he needs to seek professional counselling.

The findings will be published in the International Conference on Web Intelligence proceedings. (ANI)

Read more...

How to Create Post Title Background color with template designer

"And how can I give my post title a colour background?"

The first thing I thought of trying is to go to LAYOUT > FONTS AND COLORS as described in my previous post Changing fonts and colors for New Blogger (xml).

However, Blogger for better or for worse is constantly evolving and the LAYOUT tab is no more, replaced by a DESIGN tab and apparently have moved the template designer from Blogger in Draft to standard Blogger.

I believe that it is still possible to edit the template direct to add CSS (Cascading Style Sheet to control the post title background but found that Blogger Template Designer has provided a "Advanced" option to do that via the template designer with INSTANT PREVIEW. And apparently some of the functions of the new Blogger Template Designer can be used even if the template you are using for your blog has not been designed with Blogger Template Designer

So to change/control post title background color:
1. Sign into Dashboard
2. Click DESIGN tab to get to LAYOUT
3. Click TEMPLATE DESIGNER sub-tab
4, Click ADVANCED at the top-left corner
5. Scroll down to bottom of sub-menu and click ADD CSS (see screen shot below):


and there I add this line of CSS:

.post-title { background-color:#blue; }

and immediately below the change is previewed (see screen shot below and noticed background color has been changed to green. For more color options, refer to HTML color codes:


6. If you are happy with the changes, click APPLY TO BLOG to save the changes to your template:


Read more...
Related Posts with Thumbnails

  © Blogger templates The Professional Template by yourbetablog.blogspot.com 2008

Back to TOP